
Setting Up Xamarin Studio and Monodroid
I’ve spent the past few hours working through a fresh install of Xamarin Studio. While most of it is really easy, there are some major gotchas. The best thing about the process is that it is one installer for everything including dependencies. The download page misleadingly asks you what level license you want when. Ignore that. It has nothing to do with the installer or the license you actually wind up using. If you’re just trying it out there’s a 30 day trial license that gets you access to all of the features.
The installer pulls down all of the Android development tools as well: the emulator, the SDK manager, java samples. Everything. After the installer finishes you are ready to write your first android app. Almost.
Hello World in Xamarin Studio
First thing I did was fire up Xamarin Studio (their IDE) and create a new Android Application. Out of the box this is a “Hello World” app with a single button on a page. Couldn’t get much simpler. It didn’t compile for me. I got:
‘Error MSB4018: The “Aapt” task failed unexpectedly’ on new Android Application. No code added.
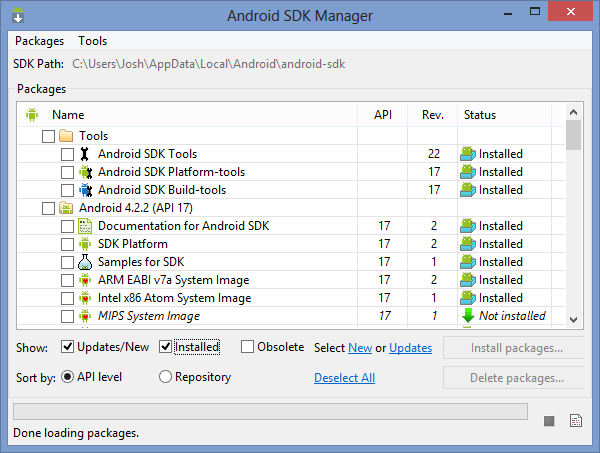
The solution here was fairly simple. Go to the Android SDK Manager (it should be in your start menu/screen) and install all of the updates. Just click the install button on the bottom right.
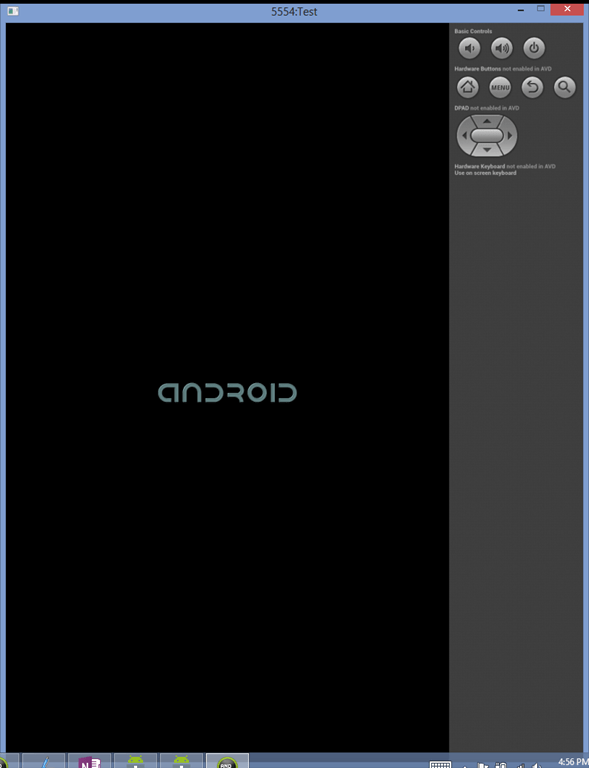
Once that’s done you can go back and run your app. It will prompt you to launch an emulator and deploy the app automatically. One thing to note here is that the emulator can take a while (minutes) to start up. Even worse, once it is fully started it stays on the ANDROID loading screen waiting for you to hit a button. There’s no way for you to know it’s ready for you unless you go back and poke it every now and then.
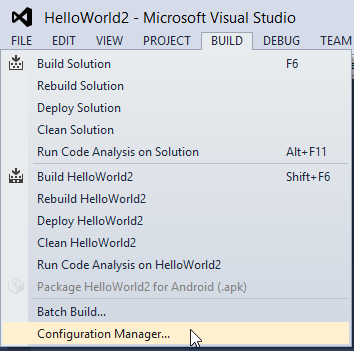
Debugging in Visual Studio
While Xamarin Studio seems to be a decent IDE and you can debug an application from there (breakpoints, watch screens, variable evaluation on mouse hover, threads list, etc.) I am definitely more comfortable with Visual Studio. If you don’t have a trial (or real) license yet, you will be prompted for it when you open up a Xamarin project in Visual Studio, either by opening the solution file you created in Xamarin Studio or by creating a new Android project directly in Visual Studio. That’s where it stops being easy though. The first thing you might notice is that when you try to debug the application you get the following error:
The application could not be started. Ensure that the application has been installed to the target device and has a launchable activity (MainLauncher = true).
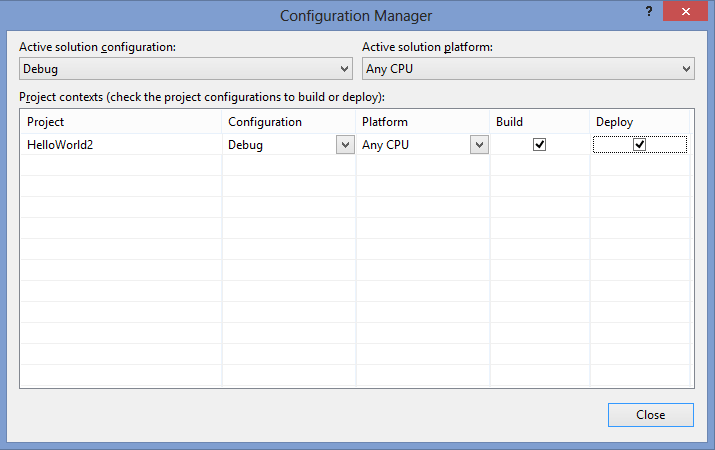
Additionally, check Build->Configuration Manager to ensure this project is set to Deploy for this configuration.
The error message is right, the application wasn’t installed on the “target device” (the emulator). If you created the project in Xamarin Studio you need to explicitly tell VS that you want to deploy the app the phone before debugging. Go to the Configuration Manager and ensure that Deploy is checked off for your project.
If you created the project in Visual Studio, you shouldn’t have this problem. it seems to only happen when you create the project in Xamarin Studios first.
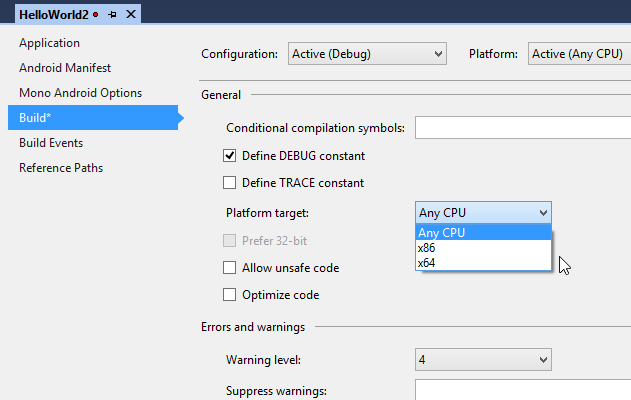
Now that the application is deployed to the phone there is still one more hurdle before you can debug from Visual Studio. Whenever I tried to attach to a running virtual machine the debugger would deploy the app and chug along for a little while. Eventually it would quietly die and disconnect. The application wouldn’t load in either the debugger or emulator. I didn’t see anything in the log file that helped point to the problem. Eventually I got lucky and determined that I could connect if the virtual machine was running an Intel Atom (x86) processor then everything worked. My assumption is that Visual Studio doesn’t know how to compile for ARM. If you look at the project properties for an Android app in Visual Studio, there is only x86 and x64:
Xamarin’s site has some pretty easy to follow instructions on how to configure an x86 emulator. The main task is to install Intel’s HAXM software. What they skip over is that you can’t install this if you have Microsoft Hyper-V installed. Hyper-V is Microsoft’s hardware virtualization stack that is used by the Windows Phone Emulator. Ben Armstrong has some really good instructions on how to create a profile in Windows that will disable Hyper-V at startup. They boil down to two commands to run on the command line and a restart:
bcdedit /copy {current} /d "No hypervisor"
bcdedit /set {GUID From the previous command} hypervisorlaunchtype off
For the GUID in the second command, copy the output of the first command including the brackets. It should look something like this: {7d067ad2-16ce-11e2-a059-9b573bf76ddc}. Then just restart the computer and select “No hypervisor” when prompted at the boot screen. From here you can continue through the instructions on how to configure an x86 emulator.
There’s a trade off here. You won’t be able to switch between debugging a Windows Phone application and an Android application without restarting your computer, but on the other hand, because it uses hardware level virtualization, the x86 emulator is significantly faster than the ARM versions.
UPDATE:
After running these two commands a couple of times, I got lazy and wrote a powershell script to do everything in one go:
# This script makes a copy of the current boot record and disables Hyper-V
# The next time the computer is restarted you can elect to run without Hyper-V

$output  = invoke-expression 'bcdedit /copy "{current}" /d "Hyper-V Disabled"'
$output -match '{.*}'
$guid = $matches[0]
$hyperVCommand = 'bcdedit /set "' + $guid + '" hypervisorlaunchtype off'
invoke-expression $hyperVCommand
Summary
Here’s a quick run down of the steps covered above
- Download and install Xamarin Studio
- Install all the updates in the Android SDK Manager
- Make sure Visual Studio knows to deploy the app before trying to debug
- Disable Hyper-V
- Configure an x86 emulator
this post was originally on the MasterDevs Blog