
Creating Labels On Curved Models In Fusion 360
Creating Labels on Curved Models in Fusion 360
It’s really easy to create labels on flat models in Fusion 360:
- Create a new sketch on the flat face of your model.
- Use the text tool to add your label.
- Exit the sketch.
- Emboss the sketch on to the surface.
But it’s a little more tricky to create labels on curved models.
Here’s how to do it
-
Create a new body with a curved surface that you want to label. Rename the body
Mainto keep track of it. -
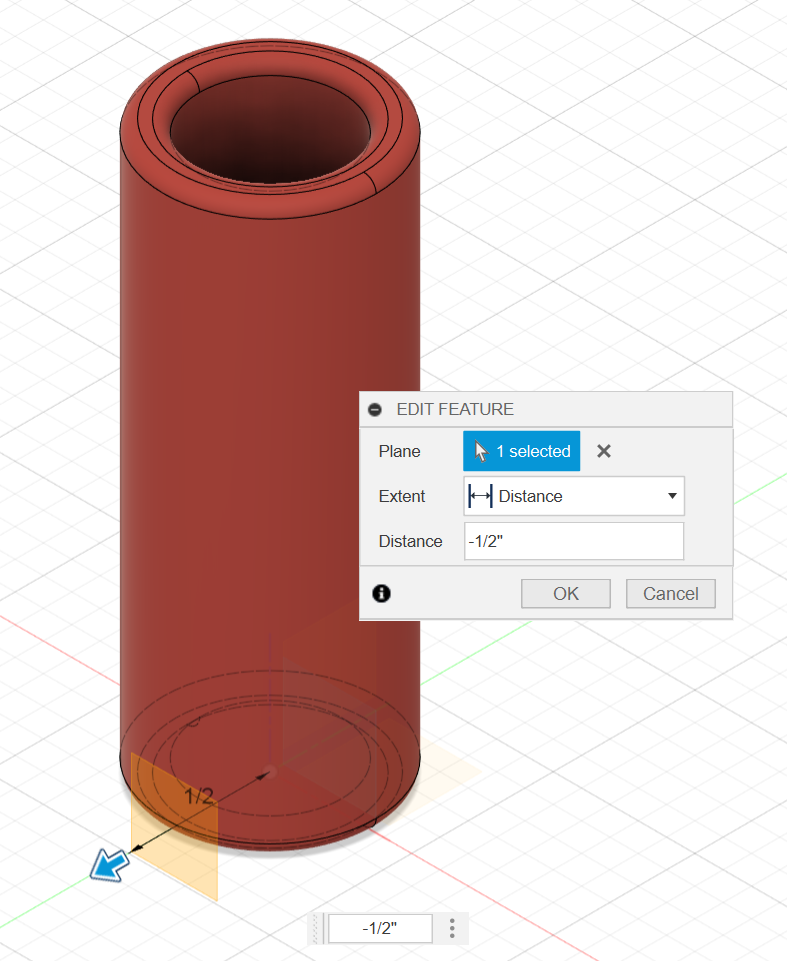
Create an offset plane outside of the body.

-
Create a sketch on that plane with whatever message you want.
-
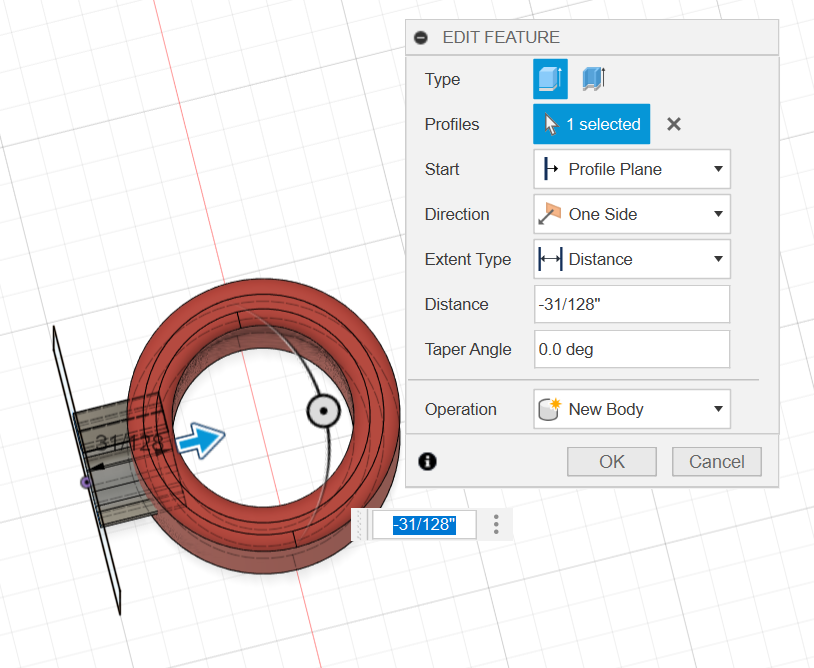
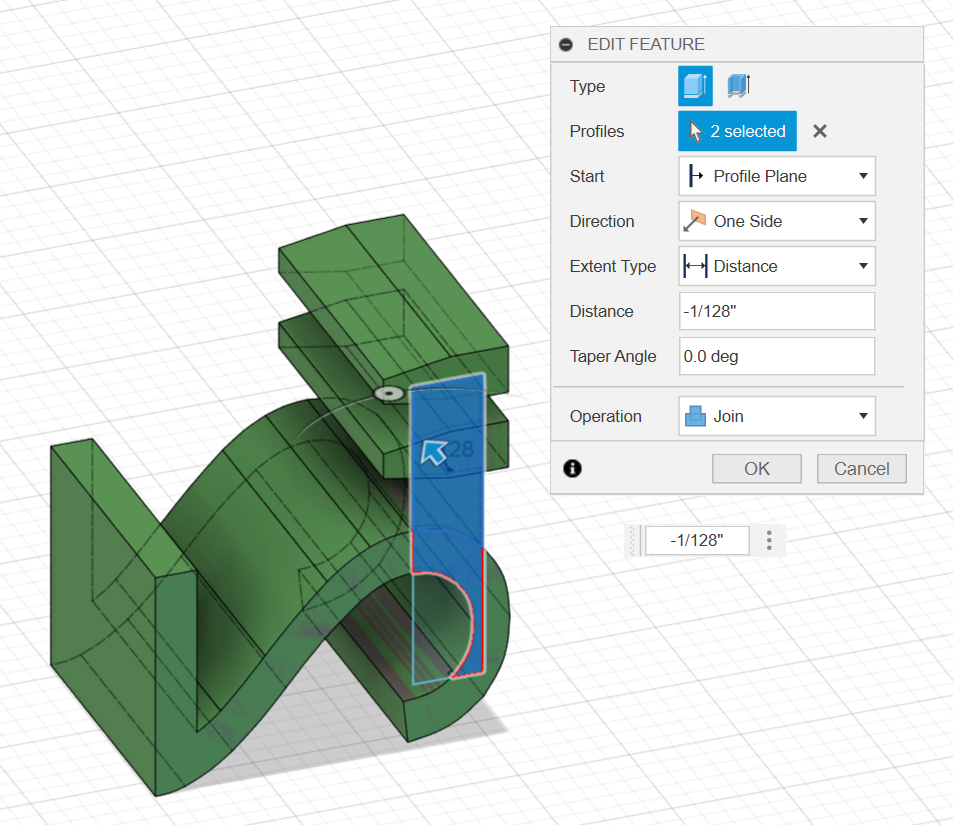
Extrude the the sketch through the surface of your body. You need to make sure you have this deep enough that the full text will intersect with the body.

-
Create another sketch on the back of the extrusion. This just needs to intersect all of the letters of the text. If there are any hollow areas of your text (the circle in the center of an
e, for example), you want to make sure that you exclude the hollow areas. You can either do this directly by not intersecting with the hollow areas, or you can project the letters from the original sketch onto the new sketch. In the screenshot, you can see that the sketch is just a simple box that overlaps all of the letters.
-
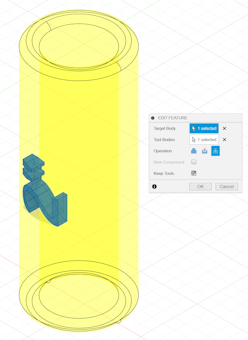
Extrude the new sketch through the bodies of the old sketch, effectively joining them together into one body. This makes it easier to do the next few steps because you’ll have a single body to work with instead of one body per letter.

-
Name this new body
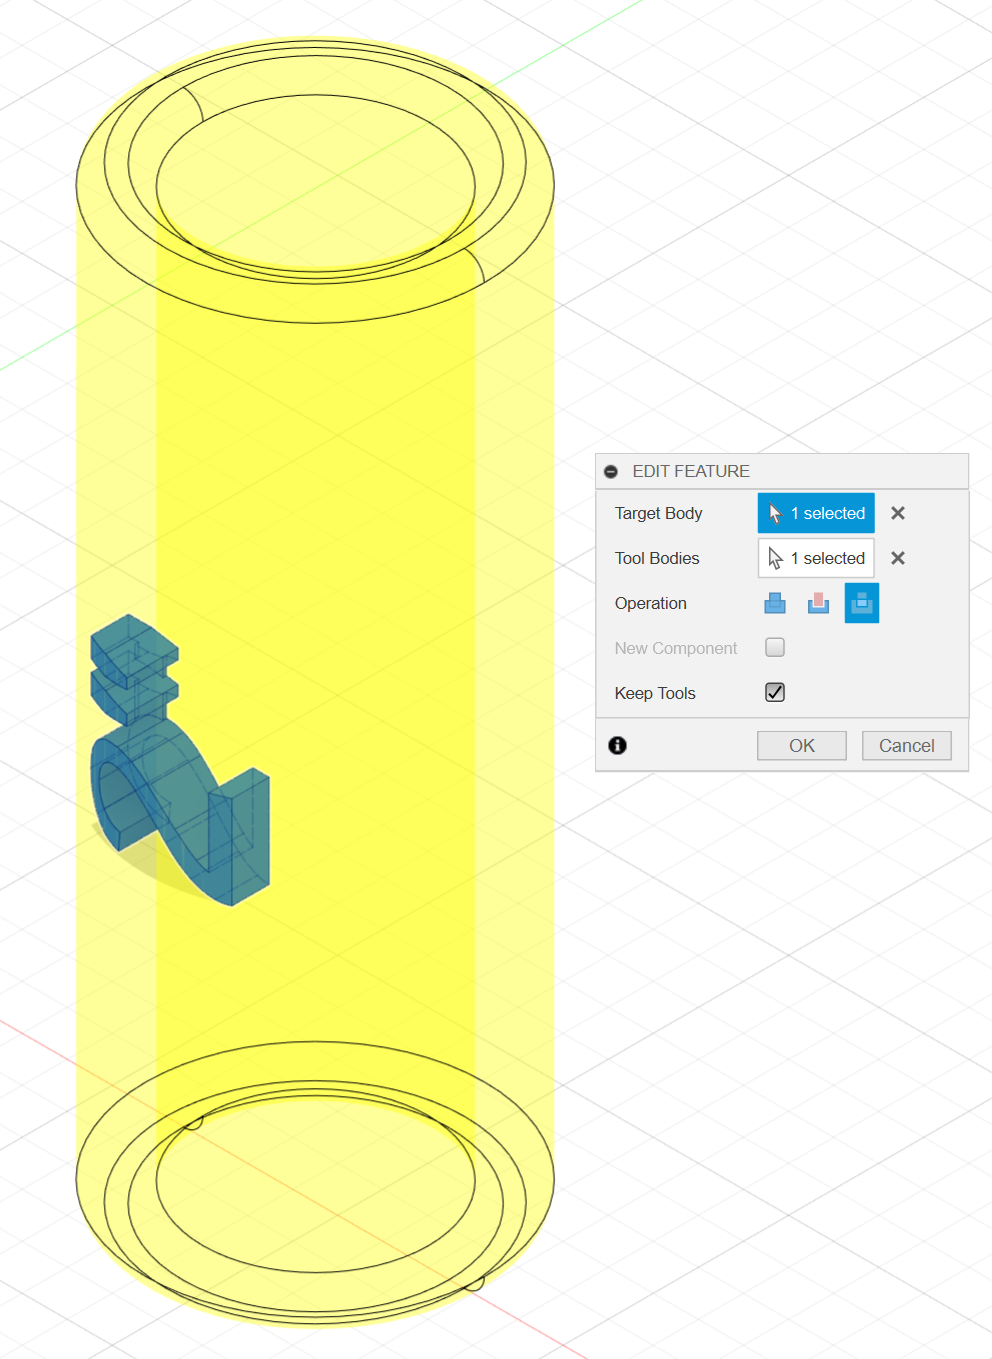
Label - Use the
Combinetool to trim theLabelso it doesn’t extrude past the face ofMain.- Target:
Label - Tool:
Main - Operation:
Intersect - Keep Tools: True
- Target:
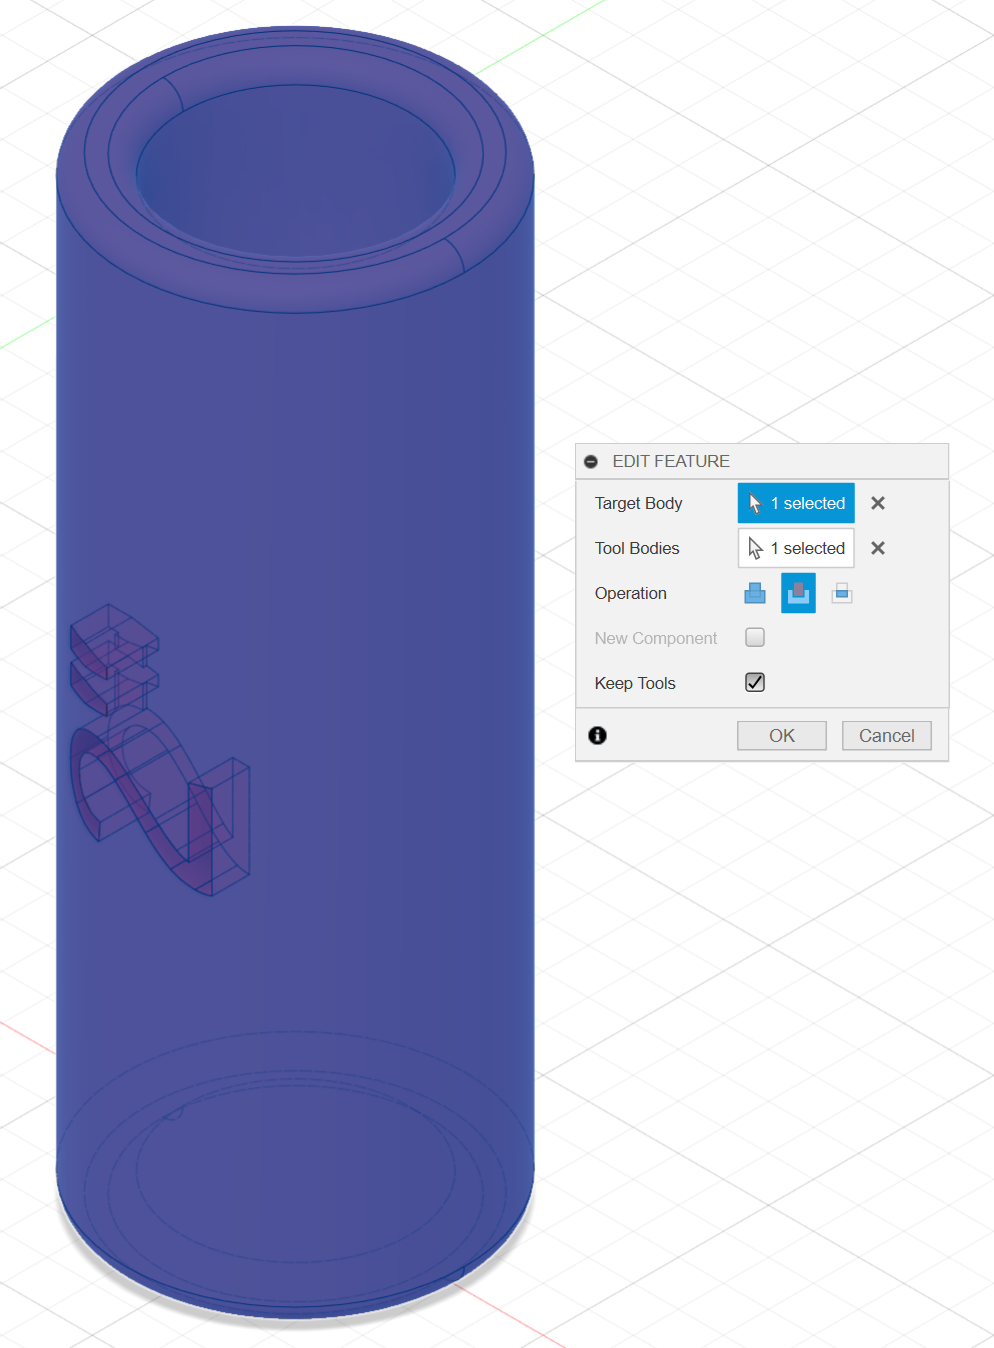
- Use the
Combinetool again to create the recess for the label to fit into.- Target:
Main - Tool:
Label - Operation:
Cut - Keep Tools: True

- Target:

Done.