
Convert Azure Publish Profiles to FileZilla config files
Occasionally I need to FTP into one of my Azure websites. Sometimes it’s to look at the logs; other times to upload a few files. Just about every time I go to do this, I realize that I don’t know the credentials. So I go and download the publish profile and open it up in my favorite text editor to get the FTP information and manually enter that in FileZilla.
I quickly became tired of doing this, so I wrote a console app that will do it for me. The source code and executable are available on my GitHub.
Usage
- Download your publish profile
- Run the command line tool
- Import the config file to FileZilla
Download your publish profile
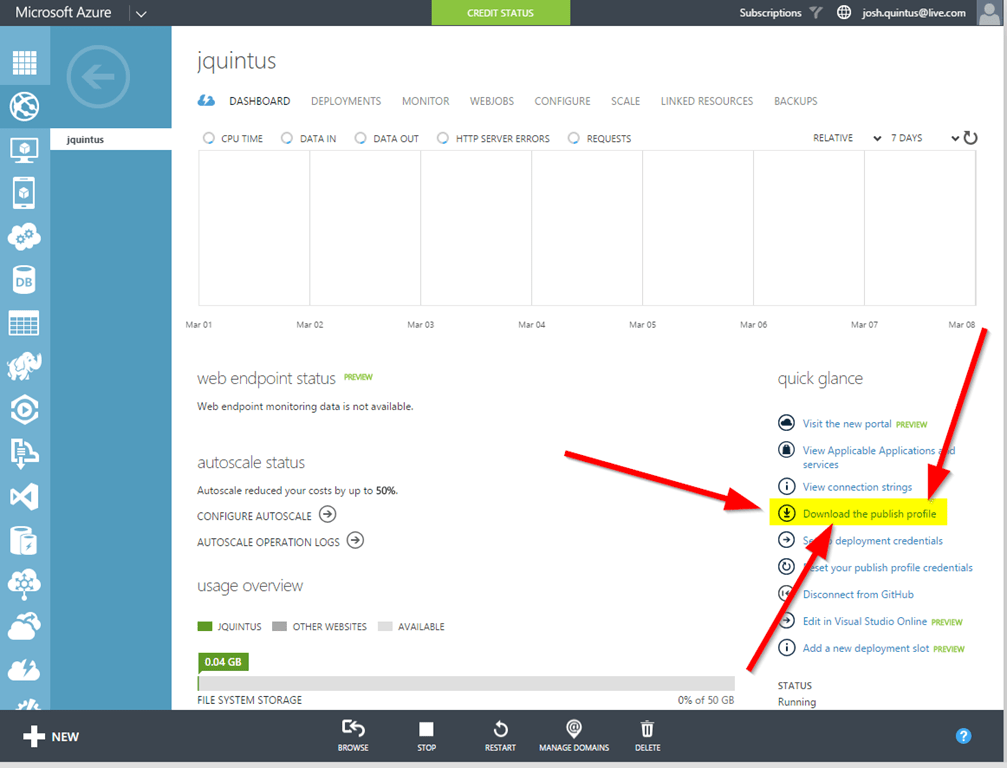
Log on to the Azure management portal for the website you want to FTP into. On the right side of the dashboard page you will see an option to “Download the publish profile.” Click it and you’re on your way.
When downloaded the file will look something like this:
<?xml version="1.0" encoding="utf-8" ?>
<publishData>
  <publishProfile
    profileName="TestSite - Web Deploy"
    publishMethod="MSDeploy"
    publishUrl="testSite.scm.azurewebsites.net:443"
    msdeploySite="testSite"
    userName="$testSite"
    userPWD="test password"
    destinationAppUrl="http://testSite.azurewebsites.net"
    SQLServerDBConnectionString=""
    hostingProviderForumLink=""
    controlPanelLink="http://windows.azure.com"
    webSystem="WebSites">
  </publishProfile>
  <publishProfile
    profileName="TestSite - FTP"
    publishMethod="FTP"
    publishUrl="ftp://waws.ftp.azurewebsites.windows.net/site/wwwroot"
    ftpPassiveMode="True"
    userName="testSite\$testSite"
    userPWD="test password"
    destinationAppUrl="http://testSite.azurewebsites.net"
    SQLServerDBConnectionString=""
    hostingProviderForumLink=""
    controlPanelLink="http://windows.azure.com"
    webSystem="WebSites">
  </publishProfile>
</publishData>
Obviously, all the pertinent connection information has been scrubbed clean. But you get the idea.
Run the command line tool
Next thing you need to do is run pubToFz.exe to convert the publish profile into a format that FileZilla understands. Assuming the default download location, the command would look like this:
pubToFz %home%\downloads\testSite.publishProfile
By default, the tool creates an file named FileZilla.xml in the current directory. The file will look something like this.
<?xml version="1.0" encoding="UTF-8" standalone="yes" ?>
<FileZilla3>
  <Servers>
    <Server>
      <Host>waws.ftp.azurewebsites.windows.net</Host>
      <Port>21</Port>
      <Protocol>0</Protocol>
      <Type>0</Type>
      <User>testsite\$testsite</User>
      <Pass encoding="base64">base 64 encoded test password</Pass>
      <Logontype>1</Logontype>
      <TimezoneOffset>0</TimezoneOffset>
      <PasvMode>MODE_DEFAULT</PasvMode>
      <MaximumMultipleConnections>0</MaximumMultipleConnections>
      <EncodingType>Auto</EncodingType>
      <BypassProxy>0</BypassProxy>
      <Name>TestSite</Name>
      <Comments />
      <LocalDir />
      <RemoteDir />
      <SyncBrowsing>0</SyncBrowsing>
    </Server>
  </Servers>
</FileZilla3>
Again, this was scrubbed clean.
Import the config file to FileZilla
Now all you have to do is open up FileZilla and import the config file that you just saved.

this post was originally on the MasterDevs Blog